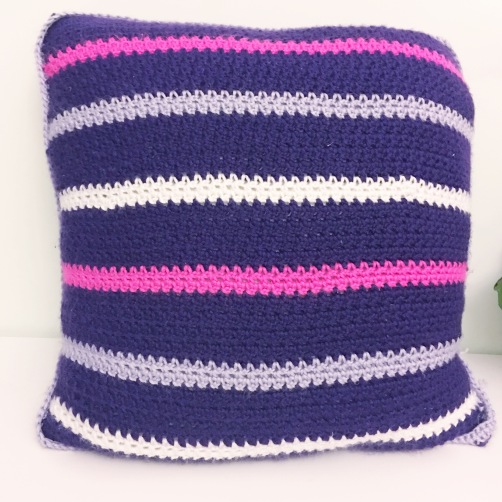
This cushion has been named after my daughter – Olivia. The cushion was made for her and with her guidance as to colours and style. Olivia is not in to frills or “girly” designs, she likes everything to be balanced or equal and it most definitely needs to be symmetrical! So while I was doubtful about it to begin with, I was quite happy with the result of this cushion once it was finished!
This is a really simple stitch and pattern to make so don’t be scared off by my method for writing instructions!
YARN
For this I used Knit Picks Mighty Stitch yarn. This is one of my favourite worsted weight yarns! It is soooo soft and quite well priced too. It is 20% superwash wool and 80% acrylic and such a lovey yarn to work with.
So the quantities…
- 2 x eggplant (the very deep but vibrant purple)
- 1 x wisteria (the mauve colour)
- 1 x pucker (the vibrant pink)
- 1 x white
As a guide – in case you choose to make this with your preferred worsted weight yarn – each ball is 100grams / 208 yards. I used a 5.5mm hook. I used up all of the eggplant (one skein for each side) but I did have lots of the other 3 colours left over.
If you want to use a finer yarn then increase the number of stitches per row, just make sure to keep with even numbers. If unsure how many to make, then start the chain and keep going until it easily covers spans the cushion across the fattest part (note that it may “shrink” a bit when you start the rows, but it will also stretch once finished). I used this method and it worked out for me! You will also have to consider doing more rows to get it long enough – just aim at making it square…
PATTERN
I didn’t use one! I had a 45cm cushion insert, so I made two matching squares to fit the size of the cushion.
Here is a guide to what I did…
I used the moss stitch, with a beginning chain of 80 stitches. If you’re not familiar with the moss stitch it is an alternating single crochet (sc) (double crochet if you’re using UK terms) and chain stitch (ch) – that is *sc1,ch1* across the row. There are also these things to note:
- The first row start by putting a sc in the second stitch from the hook then chain 1, skip a stitch and single crochet in the 4th stitch…continue across the row.
- In the even number rows (ie rows 2, 4, 6, etc) the sc works into the chain space of the row before
- In the odd rows (3, 5, 7 etc) the sc works in to the sc of the row before.
- always work a sc into the first sc.
- always finish a row with a sc – so the odd rows will have the last two stitches as sc
And remember…crochet is really forgiveable! If it seems that you’re getting narrower or wider (sometimes I lost focus at the end of the row) – either go with it or increase or decrease at the end or start of the row to try and fix it. I did better with the second piece than the first piece!
For the stripes…here are the important things to note:
- the main colour (eggplant – colour A later) has 9 rows each time
- the stripes (white, mauve, pink – B, C, D) have 3 rows each time
- I did two stripes of each colour (total 6)
- I ran out of the eggplant at approx row 77 so the last band of eggplant is not a full 9 rows (roughly 5 rows)
- Make sure that you start the stripes in the same order for the front and the back as the stripes will need to be matched up perfectly when you join them together. (Olivia is fussy like that!)
So to keep track on the counter for rows…these are the row numbers that each colour ends on…
- 9 | 12 | 21 | 24 | 33 | 36 | 45 | 48 | 57 | 60 | 69 | 72 | 81 (or when you run out of colour A)
Put another way…these are the rows for each colour…
- ROWS 1-9 = Colour A
- Rows 10-12 = Colour B
- Rows 13-21 = Colour A
- Rows 22-24 = Colour C
- Rows 25-33 = Colour A
- Rows 34-36 = Colour D
- Rows 37-45 = Colour A
- Rows 46-48 = Colour B
- Rows 49-57 = Colour A
- Rows 58-60 = Colour C
- Rows 61-69 = Colour A
- Rows 70-72 = Colour D
- Rows 73-81 (or when you run out) = Colour A
JOINING
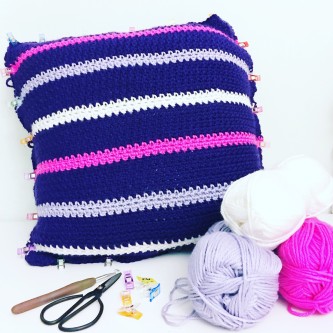
Before you join – make sure that it is going to fit your cushion! I found it easiest to first clip the pieces together (right sides out) and made sure that the stripes matched evenly.
I did not leave an opening in the cushion. My way of thinking is that if I need to wash it I’m more likely to throw the whole thing into the machine on a gentle cycle than I am to take the cover off and watch it separately.
So to join I simply did two rows of sc all the way around with these things to remember:
- one sc into each stitch – the first round will be into the chain space and the sc on the top and bottom and the sides will be one into each sc.
- don’t stress too much as the second round will make it all ok as the stitches are clearer
- put 3 sc into the corner stitches.
- for the first round, it might be easier to leave the insert out until you get to the fourth side
- at the end of the 1st round, slip stitch to the first sc then chain one and start the next row
- don’t forget to put the cushion insert in before you finish the first round! It becomes a bit cumbersome, but it’s manageable.
- it doesn’t really matter where you start as long as you follow the guide above. and finish where your started
If you prefer to have an opening, then my suggestion is buttons! To do this I would do the following:
- Start by doing the first round on each piece separately before joining them together.
- for the second round the pieces would need to be pinned with right sides out
- you will want the buttons to be on the bottom…so…figure out before you start which side that is as you won’t want to join them together
- start joining with a sc in each stitch from round one – ensuring that you work through both pieces – except for the joining side
- on the joining side, work through one piece only and – depending on the number of buttons you have and what size they are – make “button holes” by doing a chain stitch where you want the buttons to be and skipping that many stitches before slip stitching back into the row and continuing…ie if small buttons, chain two and skip two, slip stitch and continue on
- sew the buttons onto the other side (making sure you line them up with the chain stitches and do them up when finished
note: I have written the button version from my head and not from practice so I can only hope that it works!
So…I think that is it! Let me know if there is anything that doesn’t make sense or that I missed out…and don’t forget to show me your versions if you make one! I would love to show Olivia too.
xx
NOTE: since publishing this post I have generated a pdf pattern from the content. You can download it here!
