
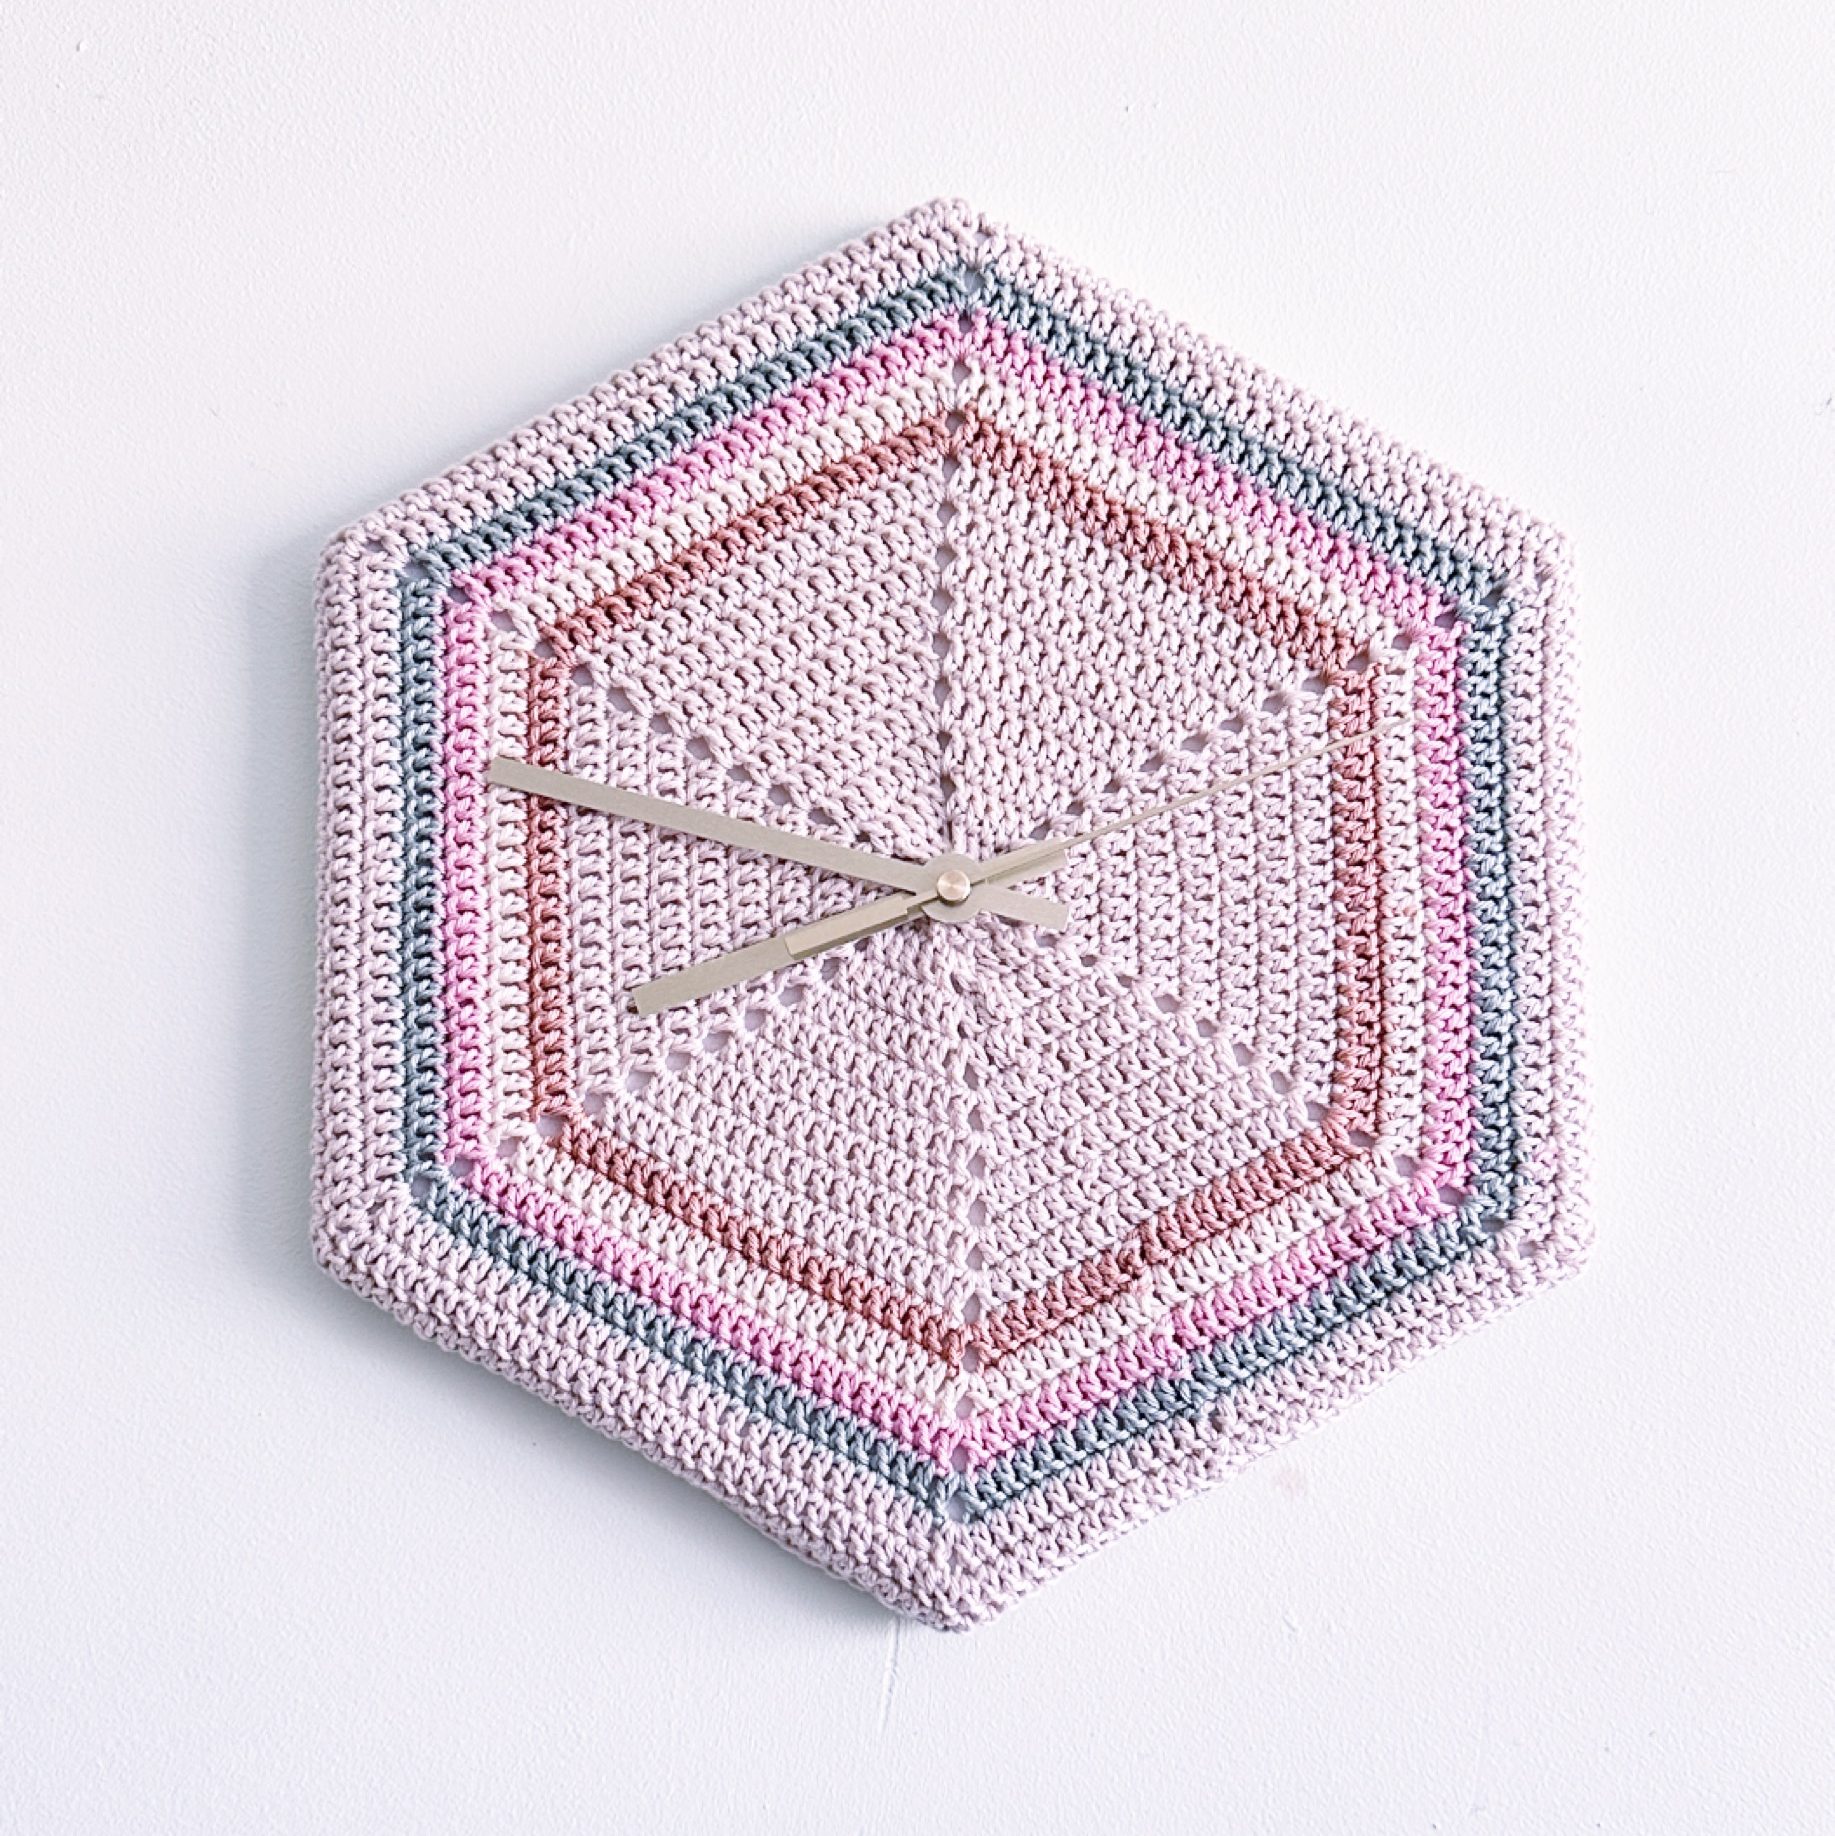
Those that know me know how much I love clocks. I love the ticking. I love the different styles that exist. I love that they’re another way to express creativitity. So it was only natural that I would eventually crochet a clock!
First let me cover the items that I used:
- 4 ply or thinner cotton – I used Scheepjes Catona
- hexagon shaped canvas – You can use any shape you prefer
- clock parts – these are fairly inexpensive to buy from places like Amazon.
- Hexagon square pattern from inside the Hooked on Crochet Club Library
- hot glue gun and glue
This ended up being much simpler than expected, but I’ve learned a couple of things that I would also like to pass on to you so that you don’t make the same mistakes that I did.
When choosing your yarn, keep the ply as thin as you can and as free of texture as you can. I went with a 4ply because that’s what I had in my stash. The cotton I’ve used is mercerised as it has more of a ‘waxy sheen’ to it and has less loose fibres. I wouldn’t go thicker than that though as I’ve had to play around with the hands of the clock a lot.
The canvas is one that people usually paint over. I’ve used them a few times for different wall hangings from granny squares so I always have some in different shapes and sizes available in my craft stash. I do intend on making a square one at some point too, so don’t feel that you need to stick to a hexagon. I also have another idea brewing for making one inside a shadow box, so watch this space for a different style clock in the future!
I’ve used the hot glue gun to make the hexagon stick around the sides. In hindsight it might have also been of benefit to use a craft glue to stick the hexagon to the front of the canvas too – mostly because of the hands getting stuck (but don’t worry I have a fix for that too).
The clock parts are the part I’ve learned the most about. I have alternatives on order and have discovered that the middle part where the hands attached come in different heights. I’ll likely swap this one out with a longer center piece when they arrive. I’m also going to glue the back clock part to the canvas. It does sit flat once it’s on the wall, but I’ll feel more confident in it once I glue it in place. You can also look at securing some cardboard or plastic to the back to give it a bit more structure as the canvas does tend to have some flex.
One of the tricks is to find and keep the centre of the piece. I drew lines from opposing corners and where they crossed is where I placed the hole. I used a hook to pierce the canvas – I’m sure that there are better ways to do it, but I was impatient and used the tool closest to hand.
Anyway, I had fun making this. It was a quick and relatively easy project and is one that I think would make for some fun gifts or market stall ideas.
This is just one way to use this granny square — but the possibilities go so much further.
Blankets, bags, cushions… even small projects that you can finish in a weekend.
And when you have a steady flow of new squares to work with, you stop wondering what to make next… and start enjoying the process of creating again.
Inside the Granny Square Club, you’ll receive a new square each month — along with the guidance to help you actually use it.
No more saving ideas and never starting them.
👉 Explore the Granny Square Club here
Seona x
