Bolero’s probably aren’t the ‘in thing’ right now, but that is never going to stop me from making one! If anything, the rebellious part of mean means that I am more likely to make one as I prefer to create things I love and not what fashion dictates.
Bolero’s are that perfect layering piece in spring/autumn or a summers evening. They’re small, they’re light and can be super warming or can add just a light weight covering depending on the yarn that you choose. The bolero that I made most recently is definitely the warm type! I’ve made it with a yarn from my stash that is a sport weight acrylic/mohair blend – Senses Lace by Stylecraft that is a discontinued yarn. I’ve also made it longer than your typical bolero as I was trying to use up all of the yarn. I’m taller and wider than Mabel pictured, so it sits at belly button level on me.

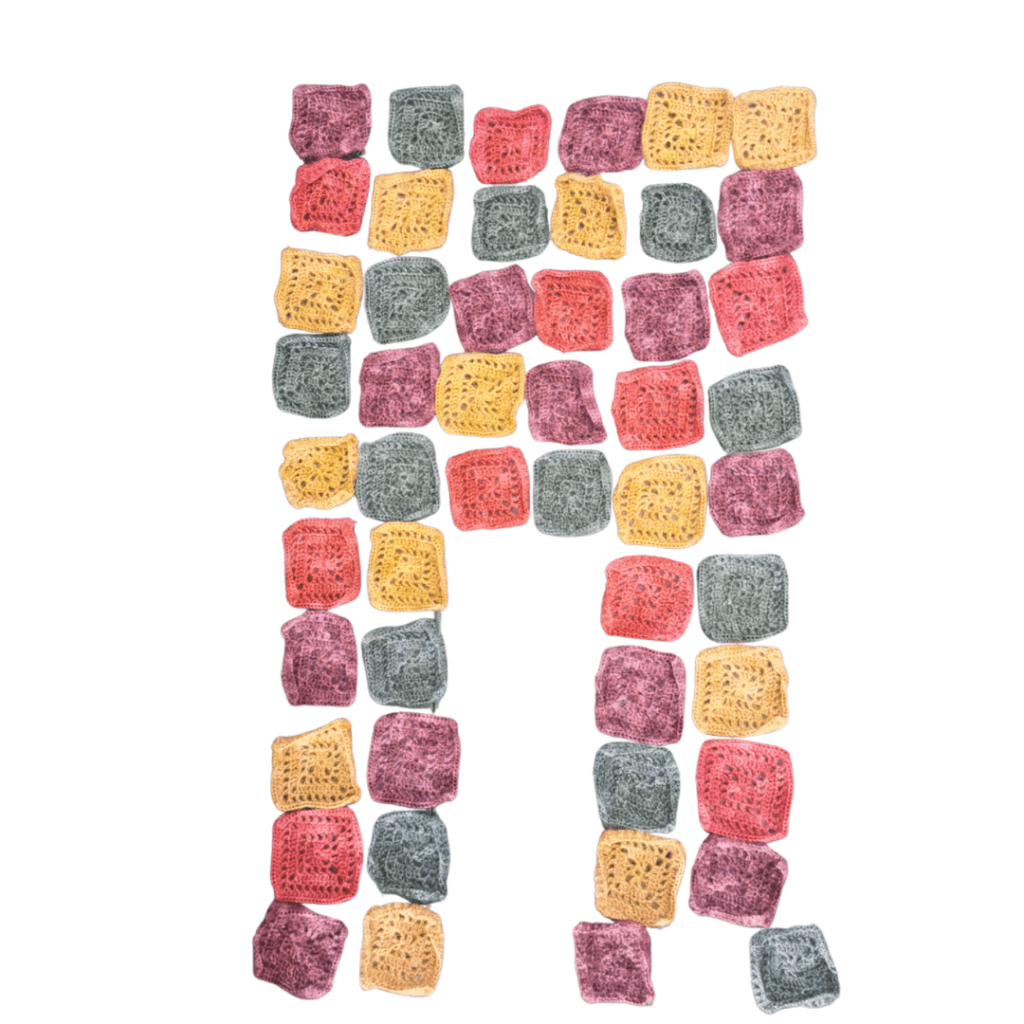
Looking at the image above I could easily have removed one or two of the rows of granny squares and still had a cute covering to wear.
How many squares I used is not important here. How many squares you need is going to depend entirely on the size and design of the square that you choose as well as the size bolero you want to make. I have used 50 squares. Each ‘layer’ for this one was 10 squares – 6 for the back and 4 for the front. You could decide on much bigger or smaller squares and still get the same result as long as you adjust the layout accordingly. I could have made it with 10 much bigger squares – it would have been slightly shorter, but it would still be a bolero.
The important part with making a bolero is the layout. You essentially want to create an upside down U shape. The base of the U (top rows in the picture) is the back and the rest of the U is the front. For every row of squares you have for the front, you need the same number of rows of squares for the back. Below is the layout I used for this bolero. Another general rule to apply is to to make the center of the U (where there are no squares) the same width as the two sides of the front. For the one below the two sides are each 2 squares wide, so I have left a gap of 2 squares to make space for my neck. When you lay it out the space fro your neck might seem really wide, but the gap narrows when you add the border at the end.
How you choose to join your squares is also not important. I have joined with single crochet. My original plan had been to sew them together for an invisible join, but by the end of this I just wanted the squares joined! You can check out my past blog posts for different joining techniques – invisible join, join as you go and joining with single crochet.
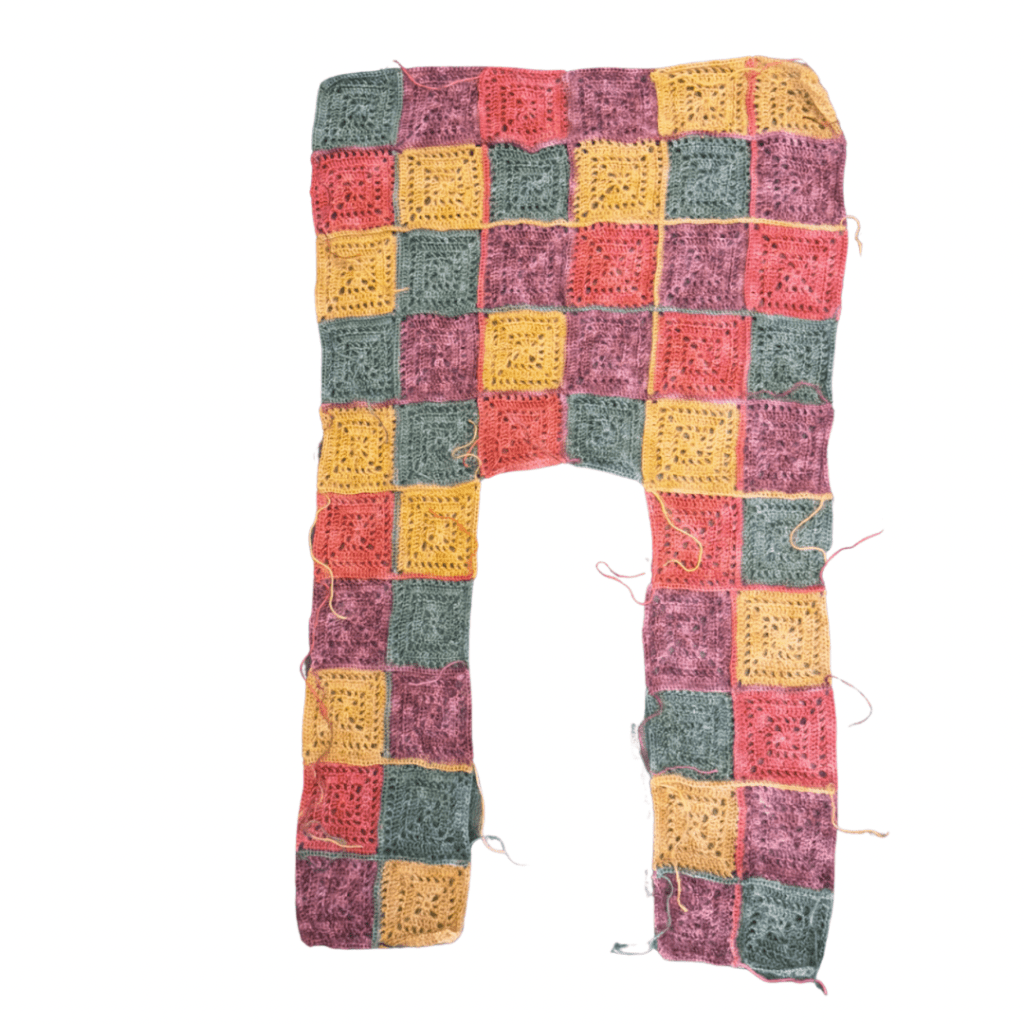
Once you’ve joined the squares together you need to fold if in half so that the front lays on the back and then just join the sides together, leaving space for your arms. I didn’t take photos of it before I joined, but I joined from the bottom up and joined 3 rows of the squares, leaving 2 rows for my arms (4 total – 2 from the back, 2 from the front). You can get some more guidance in this older blog post too.
Once joined you just need to add a border of your choosing. You’ll need to edge the arm holes and also edge all of the outside. I used a mix of single crochet and half double crochet for this one and just kept it super simple. I still have yarn left over so it is possible I might still add some rounds. I’m also tempted to add some buttons as I have some lovely wooden ones that are a perfect match for the colours. If I do decide to add them then I will need to sort out buton holes or stitch them in such a way to keep it permanently buttoned – the option I choose will depend on the laziness factor when I decide!
I hope that has inspired you into a making a bolero! They really are a wonderful layering peice and can be pieced together from any square you desire. If you love to make granny squares but get stuck with ideas for what to do with them then be sure to subscribe to my blog as I make sure at least one blog a month is dedicated to a granny square project.
If you’re feeling less than crochet confident because you struggle to read crochet patterns, then my free guide to reading them is what you need too! You can enter your details and get it sent to your inbox by visiting this page.
Seona x

Ooh looooove that Seona. Mine is going to be sheerish with sleeves (I’m old) & long ties at the front which can dangle as well but wrap also. Also longer vests are having a comeback & also alternative open weave for layering. I love your colours & design. That is a classic that can take you through eery season.
LikeLike