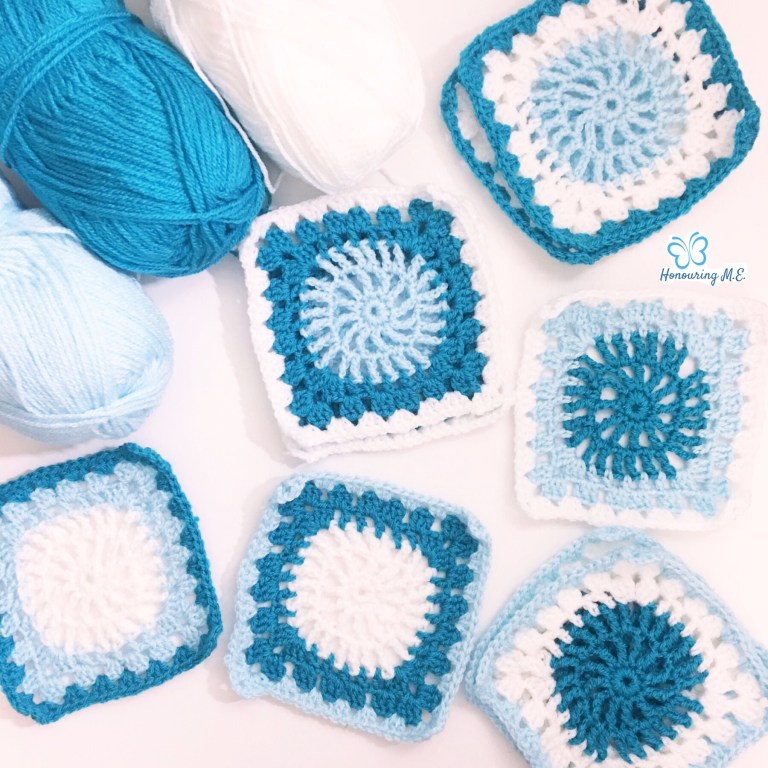
These squares were a hit on instagram and facebook this week, so I thought I would share the pattern with you.
The square that I am using is a modification from the wagon wheel in 500 crochet blocks. My book is a different edition than the one in the link, and I really hope they have ironed out the bugs in the patterns. I haven’t made a lot of the squares, but every single one seems to have a error in at least one round! The pictures and graphs never seem to match the written instructions and I have to find a way to make it work.
But anyway. I have amended the pattern to make this version of it and included my instructions below.
The yarn I am using is Scheepjes Colour Crafter in 1001 Weert (white), 1034 Urk (the light blue) and 2015 Bastogne (the dark teal). I also have 1829 Wilnis which is a darker version of the teal that I will be using to join them all later. I have no idea yet how many balls I will need, but I only have three balls each of the main colour, and one ball of the darkest colour, so I it won’t be more than that.
I am using a 4mm hook and I’m also weaving all of the ends in as I finish each square!
So you could always crochet along with me…this is a weekend project for me so you might even beat me…
I still need to decide how to join, but will most likely join each piece together in a single crochet (double crochet for UK) and will do a round of the same around the entire piece before starting on the border.
I have written this pattern in US terms and provide the translation to UK terms here. When my full pattern is eventually released it will be provided in both US and UK terms.
The abbreviations as used:
US Terms (UK Terms):
- sc = single crochet (dc/double crochet)
- dc = double crochet (tr/treble)
- tr = treble (dtr/double treble)
- ss = slip stitch
- ch = chain
You will need 3 colours – label them ABC and work the following 6 combinations for as many as it takes to get your blanket size.
ABC | ACB | BAC | BCA | CAB | CBA
Instructions:
Begin: Ch 4 and ss to the first loop to make a ring
Rnd1: ch1 (don’t count this as a stitch), work 12sc into the ring; ss to the first sc to close the ring. (12sc)
Rnd2: chain 6 (counts as a tr + ch2 space); *1tr next stitch, ch2*, repeat * to * in each stitch. ss to the 4th ch of the first ch 6, (12tr, 12 ch2 spaces)
Rnd3: ch5 (counts as a tr + ch1); into each ch2 space and each treble, work 1tr, ch1. Continue and ss to the top of the 4th ch of the first ch5. (24tr, 24ch1 spaces).
Fasten off and choose a new colour.
Rnd 4: attach to a chain 1 space and
*ch3 (counts as one dc). Work 2dc, ch3, 2dc into the same ch space* (This is your first corner);
**1dc, ch1 into each of the next 5 ch1 spaces** (This is your first side).
The next ch1 space will be the next corner.
Work from * to * for the corner (the ch3 is replaced with 1dc).
Work from ** to ** for each side. Once you have 4 corners and 4 sides ss to the top of the ch3
Rnd5: ss to the ch3 space, of the corner.
ch3 (counts as one dc). Work 2dc, ch3, 3dc into the same ch3 corner space* (This is your first corner);
**3dc into the next ch1 space; skip the next ch1 space; 3dc into each of the next 2 ch1 spaces; skip next ch1 space; 3dc into next ch1 space** (This is your first side).
Work from * to * for the corner (the ch3 is replaced with 1dc).
Work from ** to ** for each side. ss to the top of the first ch3 once the round is complete.
Fasten off and choose the third colour.
Rnd 6:
Attach to a corner.
*ch3 (counts as one dc). Work 2dc, ch3, 3dc into the same ch space* (This is your first corner);
**3dc into each ch1 space on the side** (This is your first side)
Work from * to * for the corner (the ch3 is replaced with 1dc).
Work from ** to ** for each side. ss to the top of the first ch3 once the round is complete.
Fasten off and finish
So you can consider this the beginnings of a really lazy CAL if you like. I will provide updates to status on instagram and facebook and will also share in my facebook group. Once I get to joining and the border I will share them too.
If you to make one too then be sure to use the tag #honouringmecrochet so that I can see your progress!
seona xx

2 thoughts on “Making a New Blanket”